The Ultimate Guide to Funko Daria NFTs
Join Droppp on July 2, 2024, at 11 AM PT / 2 PM ET for the launch of Funko Daria NFTs. Includes limited edition Funko Pops to collect!

If you want to send WAXP from your WAX cloud wallet to Binance, it couldn't be simpler.
Binance listed WAXP on their excellent crypto exchange and now you can trade WAXP for BTC (Bitcoin), USDT (Tether), BNB (Binance Coin) and BUSD (Binance USD).
Why would you want to deposit WAXP on Binance? If you have some WAXP lying around, maybe from an epic NFT sale, you may want to exchange it for another Cryptocurrency. This is one of the first steps if you want to 'cash out' your WAXP or if you want to sit on another crypto token.
This may be for investment reasons or maybe you want to store your money in a stablecoin such as Tether or Binance USD (tied to the US Dollar value) whilst you wait for the next hot NFT drop.
So how do I deposit WAXP from my WAX cloud Wallet to Binance?
Here is how you do it!
First off, you need to make sure you have a WAX wallet. If you have got one great! If you don't, follow our easy 3 step guide to getting started.
You also need a Binance account. This is really simple to do by following the steps on the registration page.
You usually need ID verification for the next steps. It's really quick to do, just make sure you have a Driving Licence or Passport ready.
Once you have both accounts, you are ready to transfer WAXP to Binance.
Ok, so you have some WAXP in your WAX wallet and you want to send this to Binance to trade for another Cryptocurrency.
Once you are logged in, start by clicking 'Wallet' in the top right dropdown menu:
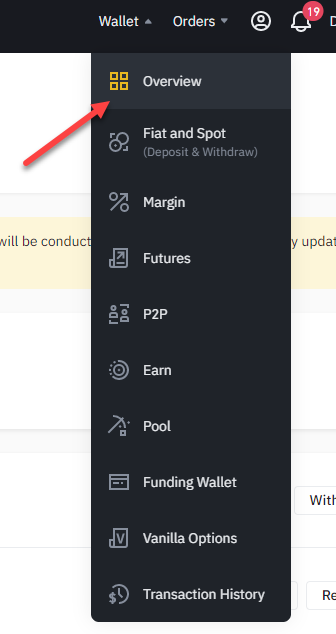
Click the 'Deposit' button near the top left of the screen:

Next, you have the option to deposit Crypto or Fiat. Select 'Crypto Deposit':
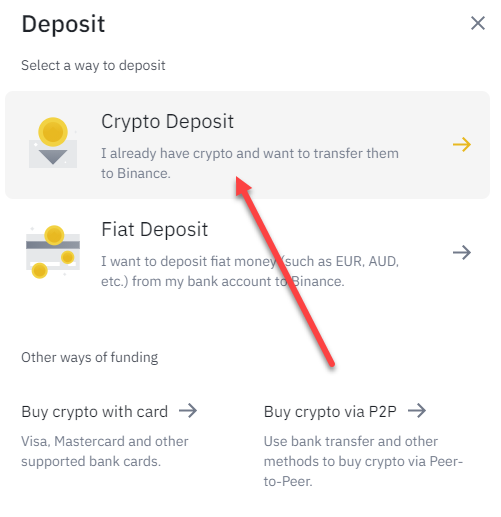
Use the drop-down 'select coin' menu to search for WAX:


It's likely this is your first time doing this, so you will see the following message:
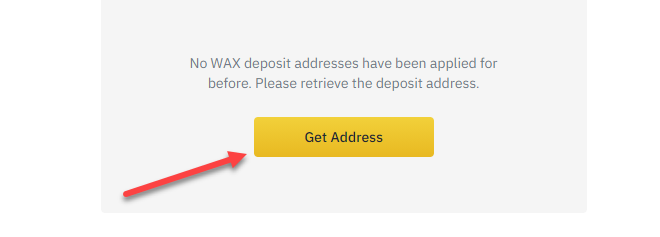
Click 'Get Address' and this will generate your wallet Address and deposit Memo. You will also see this warning:
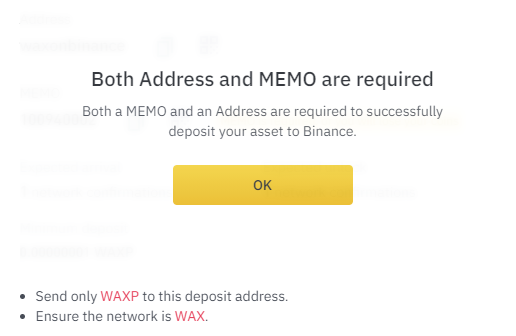
You NEED the MEMO alongside the WAX address. Don't forget this or your WAX will be lost.
Once you click ok, you will see your deposit and Memo. For example:
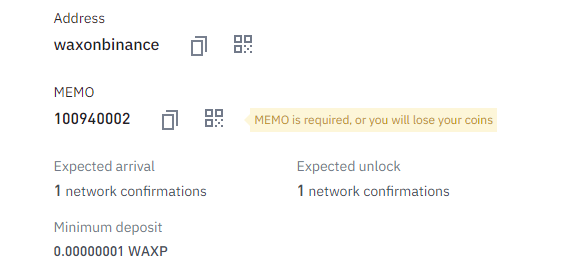
As you can see above, in this example the address is 'waxonbinance' (which will be the main WAX wallet for Binance) and the unique MEMO '100940002'. The MEMO is used to identify your account so you need this alongside the WAX address to transfer successfully.
Leave this page open and open a new tab navigating to the WAX Cloud Wallet & login.
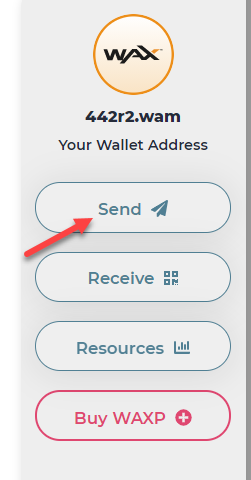
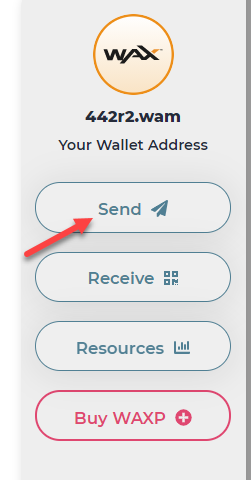
Once logged in, click on 'send' in the right navigation menu:
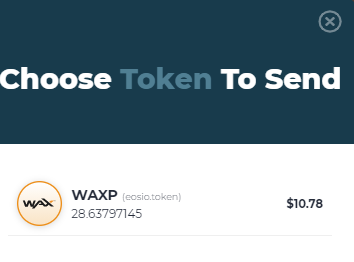
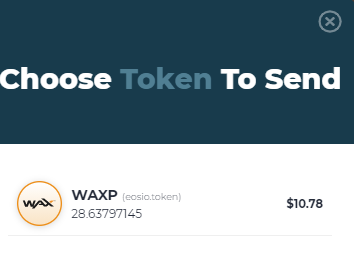
Select 'WAXP' as the token you want to send:
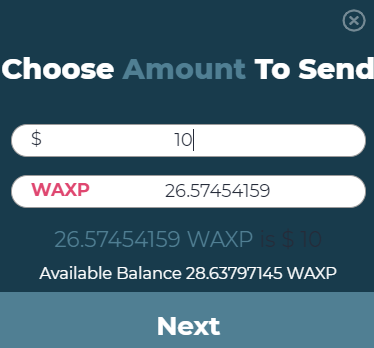
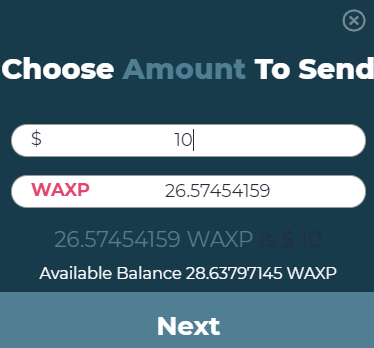
Select the amount you want to send. You can enter in dollars or WAXP. In this example, we will send $10 (rolling in it!):
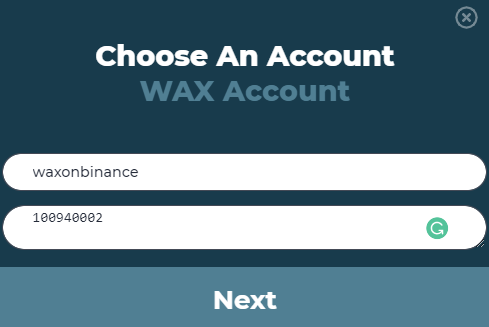
You will then see an option to add a WAX account and MEMO. You can easily copy the WAX address and MEMO from your Binance tab:

You do also get the option to use a QR code, but we find it simpler to copy and paste within the WAX Wallet fields. Like this:
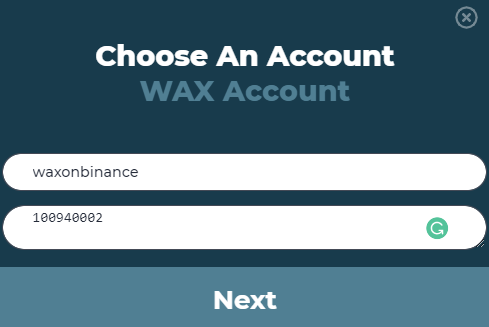
Always remember to triple check the details are correct.
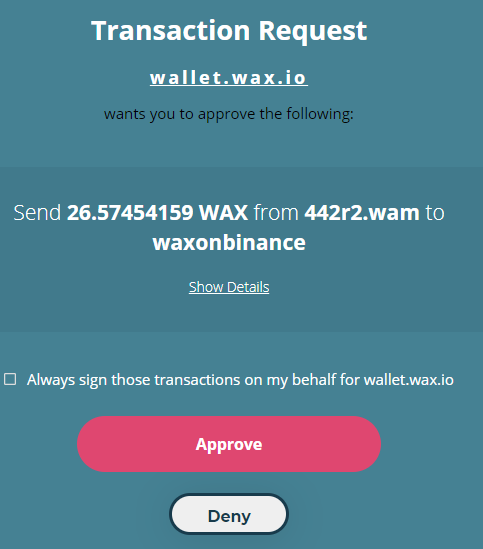
When you click 'Next' you will be asked to Approve the transaction:
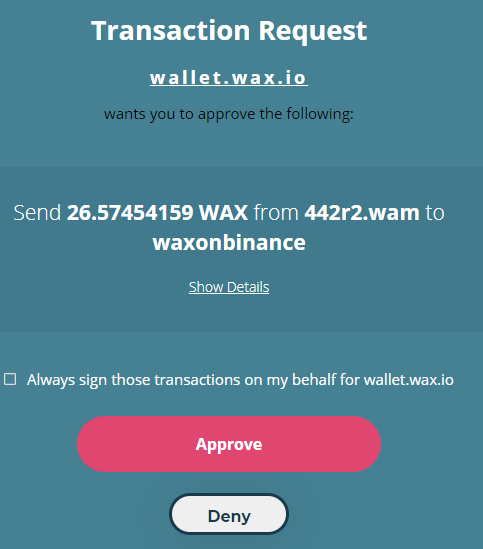
Once approved, you will get a success message like this:
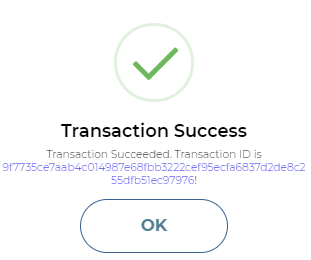
Before you click 'ok', click on the blue transaction ID. This helps for a little peace of mind whilst you nervously await the funds to hit your Binance account!
This will take you to wax.blocks.io where you can review the transaction on the blockchain:

Click on the WAX wallet you transferred the funds to (for example, 'waxonbinance') under the 'Actions' section and this will show you funds received at this address:
Look for your WAX wallet address to find the transaction. You will see the amounts and the memo over to the right-hand side. If all of these details are correct, don't worry, your funds will arrive shortly.
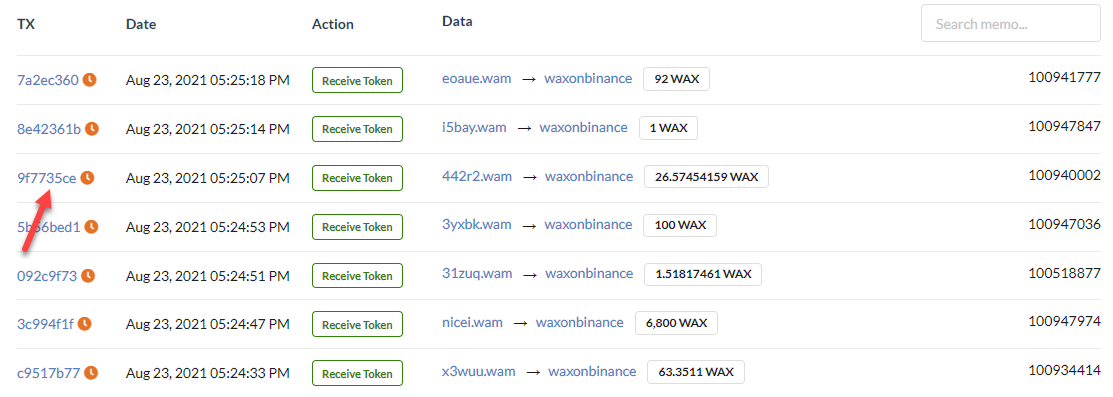
If you notice that the memo isn't correct or your funds don't arrive after 'a long time' then don't panic. Take note of the transaction ID (under the TX heading) and log an appeal with Binance.
Usually, funds will arrive within 30 minutes and you will be notified by email.
If you navigate back to 'wallet' and then 'overview' you will see the WAX icon next to your 'Fiat and Spot' wallet:

Click on the icon and you will see your balance and trading options:
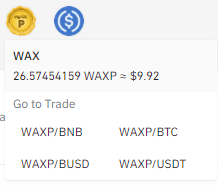
If you click on any of the trading options, it will take you straight to the trading page (which we will cover in a separate article - coming soon).
We recommend you read the desktop version above as most of the information is relevant to mobile. There is more detail above, but the below will streamline the process for mobile.
The main differences in the mobile apps are layout, so we will cover this here.
First off, you can download the app here:
Android
IOS
Once installed on your device, click the centre yellow 'arrows' icon on the bottom menu tray and select 'deposit':

Select the 'crypto' tab and search for WAX or WAXP:

You may get a message to 'create a wallet' if this is your first time. Simply proceed and this will generate your credentials.
You will also see a warning that you need both the WAX wallet address and the MEMO. This is really important or you could lose your WAX.

You need to copy these details over to your WAX Cloud wallet. We recommend using the copy buttons as the simplest way to do this.
Log in to your WAX wallet and click the WAX logo in the top right of your screen.
The process from here is the same exact same as desktop. Select 'Send' from the menu, choose WAXP as your token, choose the amount you want to send as dollars or WAX, copy your WAX wallet address AND MEMO from the Binance app over the 'choose account' fields in your WAX wallet and approve the transaction (triple check the details are correct:
Once done, you will see a transaction success message in your WAX wallet:

That's all there is to it. Binance will notify you when the funds have landed in your account. Neat!
Read our guide on how to withdraw WAX Coin from Binance to your WAX wallet.